When there is planning to move mailbox (es), there are two databases involved: One is Source Mailbox Database and another is Target Mailbox Database. In case of mailbox migration, the target mailbox can lie on same/different Server, different domain or Active Directory, or in different forest (cross-forest).
| Reason | Description |
Up-gradation |
An existing edition of Exchange Server has to be upgraded. This can be for acquiring benefits of updated edition of messaging platform. |
Realignment |
Say the current database has grown larger and for DB size optimization, some of the mailboxes from it are moved to another database having free size. |
Investigating the Trouble |
Moving mailbox from one Server to another can help to detect issues in them. Such steps can help to determine if the problem is related to mailbox or Server settings. |
Recover Mailboxes |
If the mailboxes are corrupt, migrating them to another Server will help to save healthy data from source DB to target DB, leaving behind the damaged part. |
In Exchange 2013, the medium to move mailboxes have changed. Now, it's Migration Batches that gives opportunity to migrate mailboxes locally, to different Server and allows Exchange cross forest migration. The batch comprises of number of mailboxes along with name and other statistics so that the administrator gets an idea as how many mailboxes have been successfully moved and how many are in process.
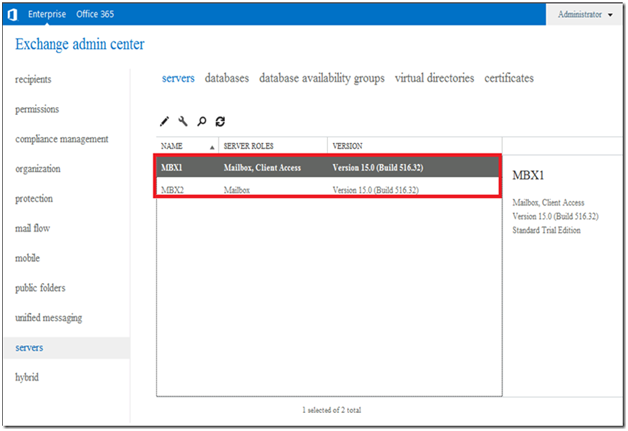
Step1) Open Exchange Admin Center and move down to "Servers" option in navigation pane. You will see the Servers name in the actions pane.
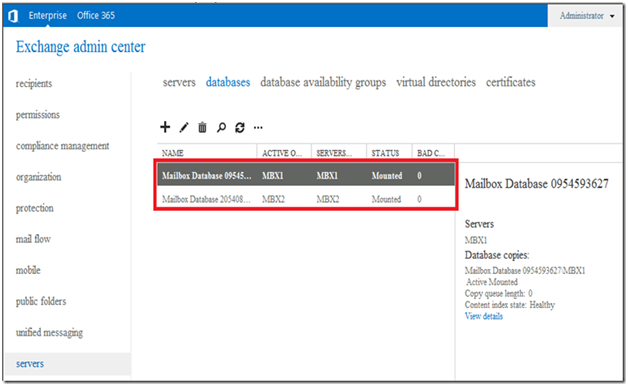
Step2) Click on "databases" tab in the actions pane to check out the mailbox databases on the Server
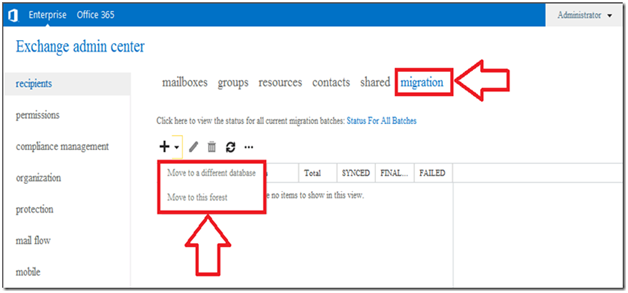
Step3) Click on the "recipients" in navigation bar at the left and select "mailboxes" in the right pane. This will enlist all the user mailboxes on screen. Click on the "migration" tab on action pane and select the type of migration that you wish to process.
Here, you can select "Move to this forest" to migrate mailboxes between Exchange 2010 to 2013 or move mailboxes between Exchange 2013 to 2013.
Then, "Move to different database" will move mailboxes to different or any local Server.
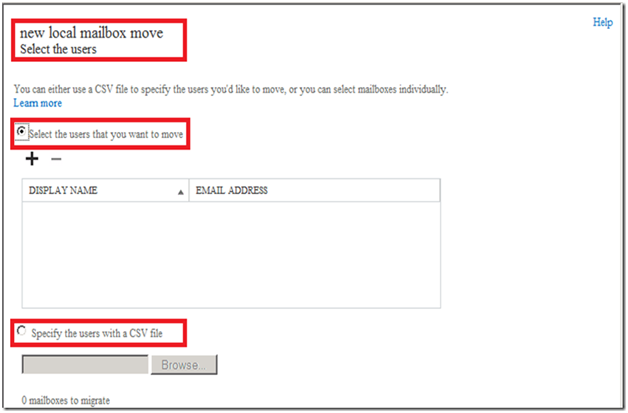
Step4) Here I am selecting the option Move to a different database. A "New Local Mailbox Move" window will pop up where mailboxes to be moved are to be selected and added. Either the mailboxes can be added manually or CSV file with mailbox details can be added for migration.
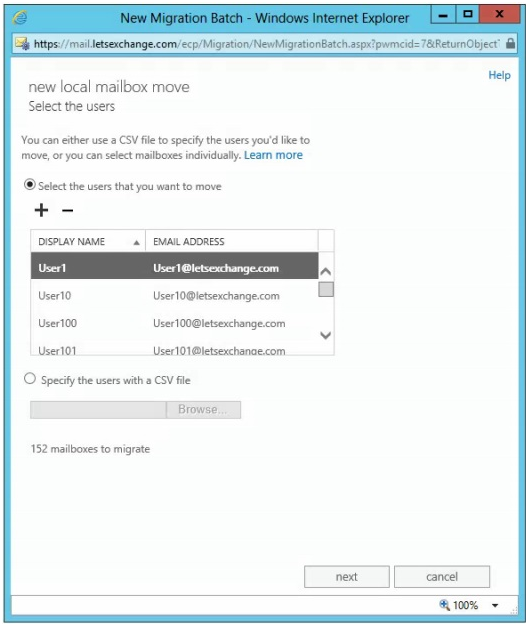
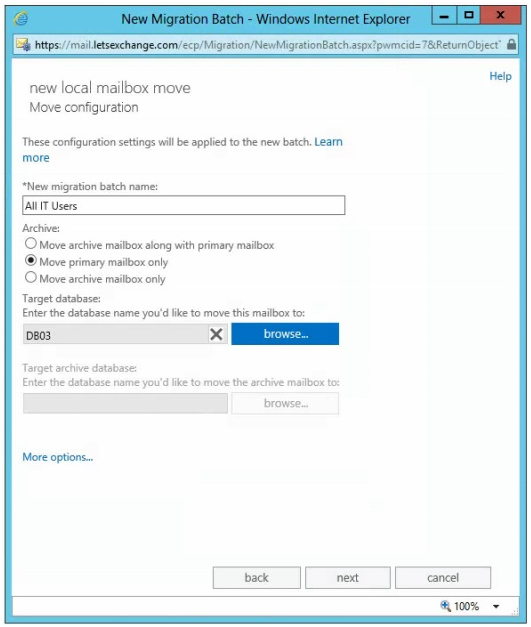
Step5) In the textbox for "New Migration Batch Name" give a name to the mailbox migration process.
If there is archive mailbox in respect to the primary mailbox to be migrated, enable the option "Move archive mailbox along with primary mailbox".
Under the "Target Database" section, define the database into which the mailboxes are to be migrated.
Provide a destination to the archive mailboxes of the primary mailboxes. Enter database name by taking help of "Browse" button.
Click on "More Options" link and you will see following selections:
Define "Bad Item Limit" and while migration if there are number of corrupt items in mailbox more than bad item limit, then the move process will be aborted.
Provide "Large Item Limit" and if there is this number of large items in the mailbox, they will be skipped else on increasing the number, the migration will be aborted. (Large items are the emails that have around 1023 attachments).
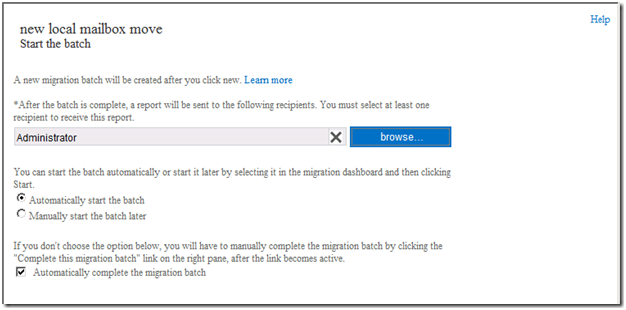
Step6) Define the recipient to whom message regarding successful migration should be sent.
On the same screen, define if you want to start the migration process soon after providing credentials or your want to save the details to start up the mailbox move process later.
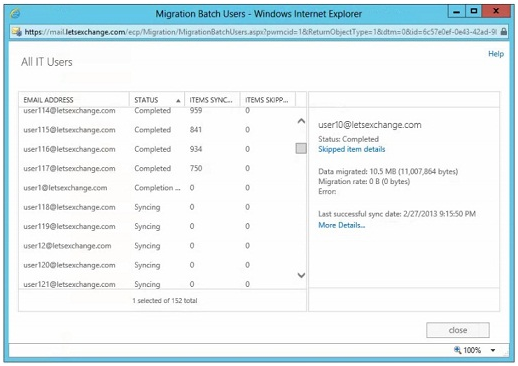
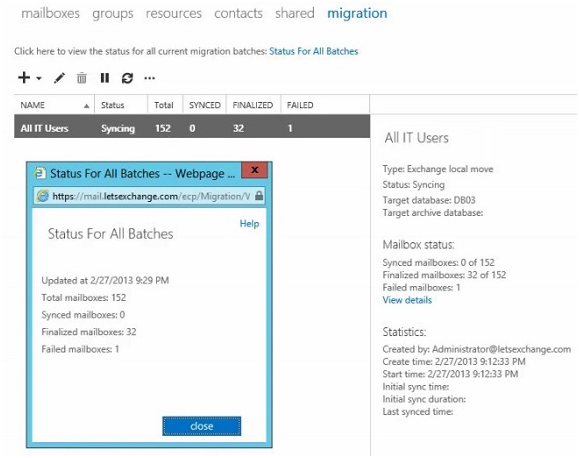
Step7) The status of mailbox sync can be availed through "Status for All Batches" link. For more details, click on "View Details" link. When you click on "View Details", the status view would be similar to this:
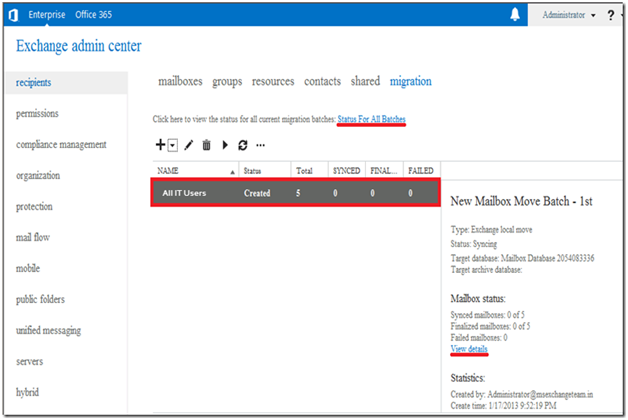
If you select a mailbox on left pane, its details will be visible in the right pane with a link "Skipped Item Details". This will give a view of the items that are being bypassed by the application from migration process due to reasons like corruption.
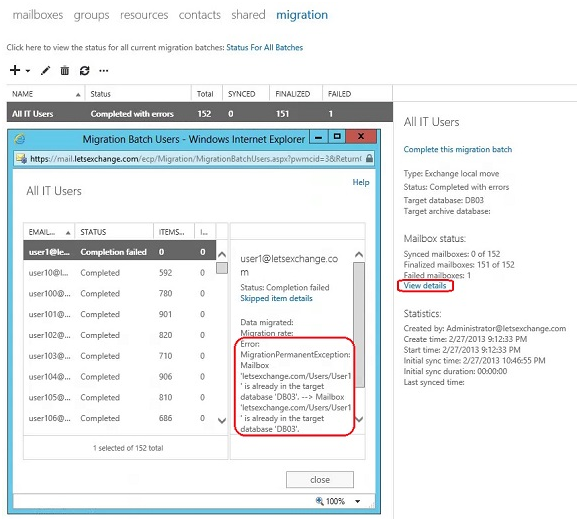
Step8) Once the migration is finished, the status for all mailbox migration completion will be displayed on screen.
Click on "View Details" button to check out move mailbox details
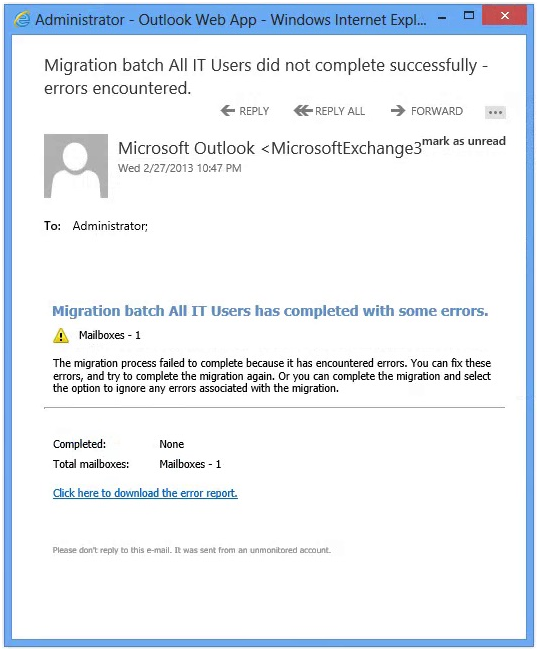
The status report of cross forest migration Exchange 2013 will be sent to defined recipients.
Summary: In this chapter, we discussed the reason for mailbox migration, the idea and the process to move mailbox to different database Exchange 2013. Step by Step procedure to move mailbox from one database to another for Exchange 2013 is discussed.

