Ever since virtualization has come into existence, utilizing this technique for Exchange Server has been a topic of concern. Reason being, the limitations of un-developed technology did not allow Exchange to fit into the virtual environment. However, over the time as virtualization has become advanced, many (if not all) limitations have been removed that gives a stable support to Exchange Server and virtualization partnership. Now, Microsoft supports virtualization for Exchange but still there are some points that administrators should take into consideration while designing virtual environment for Exchange using Hyper-V.
In an organization with Exchange Server deployed, High Availability (HA) is always a priority for administrators. Although techniques like Database Availability Group (DAG) and AutoReseed have decreased the danger of disk failure but still the threat of losing an entire disk that holds Exchange database exist.
For HA storage, the key is Redundancy where copies of data are stored at different places so as to avoid single point of failure. The good part about ever-growing technology is HA storage systems can be deployed on a Server or in virtual environment too. For HA storage, there are typically two modes adopted: one is RAID and another is enterprise-level storage clusters.
RAID is Redundant Array of Inexpensive Drives (which contrary to its name proved quite expensive initially). As the cost of disks gradually decreased, this concept became more popular and is now a part of number of desktops and Server motherboards. The main aim why RAID is acquired is it offers improved performance, fault tolerance, and definitely for simplified management of multiple hard disks. The fundamental RAID techniques introduced and used till date are:
If we talk about HA storage at an enterprise level; it is basically a combination of RAID with storage clusters. There exits at least two storage nodes that are operated by a specialized software application. In this case, if a node fails, the seconds takes over within few minutes. To make this service more effective, it has to be ensured that active and improved hardware/software is adopted. Just for an example, consider Storage Area Network (SAN) that uses automatic failover technology (Means if primary node fails; secondary takes over automatically).
In 1-tier applications like MS Exchange Server, the call for virtualization is increasing. Organizations prefer virtual environment for operation and capital reduction, for efficiency betterment, and yes of course for improving IT infrastructure. Along with this, Exchange Serer virtualization offer added benefits like Dual-Level of Resiliency where the database is shielded by Exchange Server as well the protection features in virtualization platform.
Windows Server 2008 forms the basis of virtual environment or any third party platform that is being approved by Microsoft Windows Server Virtualization Program. Also, Exchange 2007 SP1 or later edition should be used for virtualization. The earlier versions did support the scheme to virtualize Exchange environment but it was not a success due to infant technology. There is support for almost all type of storage forms that include Virtual Hard Disk (VHD), Internet SCSI (iSCSI) including Cluster Continuous Replication (CCR) and Single Cluster Replication (SCR).
Note: The Unified Server Role is not supported in virtual environment while rest of the Server roles is fully supportive.
Here is a step-by-step procedure of how to add hyper-v role to Windows Server 2012:
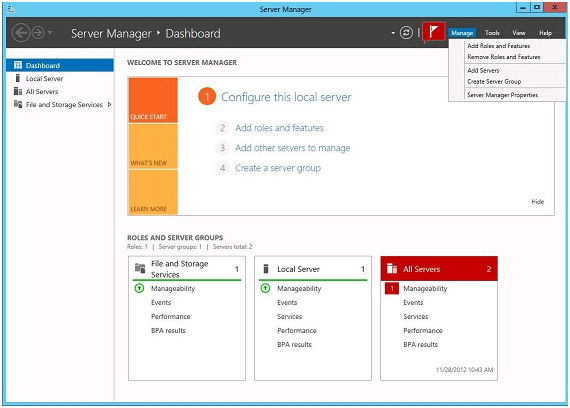
Step 1 ) Open "Server Manager". In the "Manage" menu, select "Add Roles and Features"
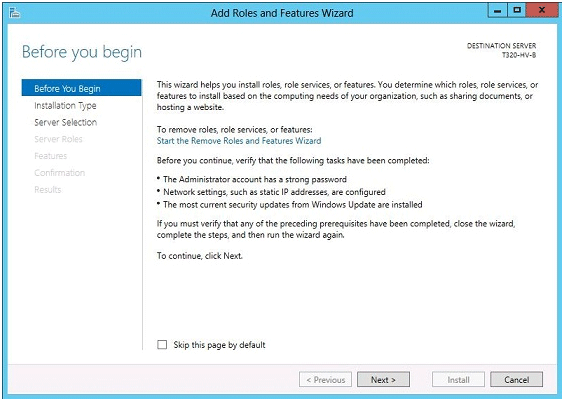
Step 2 ) Before you begin: This is to inform the application that the target Server and network is completely prepared for the roles and features that you wish to install
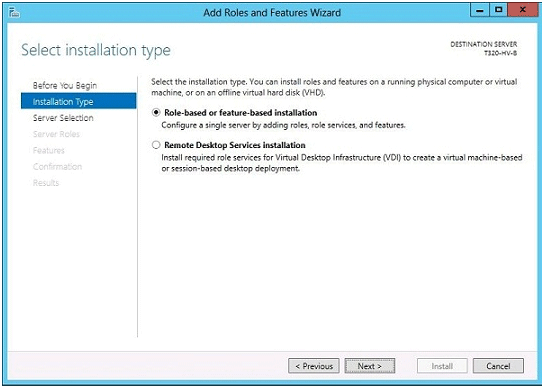
Step 3 ) Select Installation Type: On this page, choose "Role-based or feature based installation" option and click next to continue.
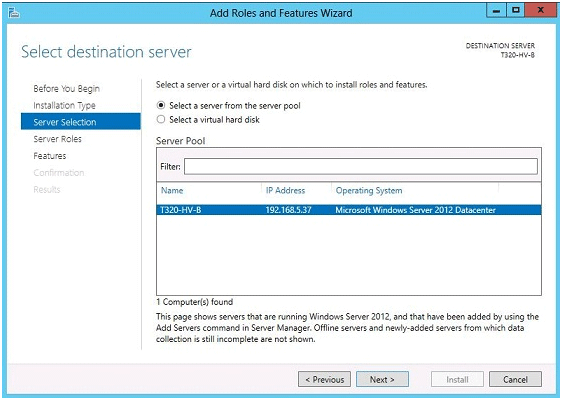
Step 4 ) Server Type: Choose "Select the Server from the Serer pool" to define the target Server on which hyper-v role has to be installed.
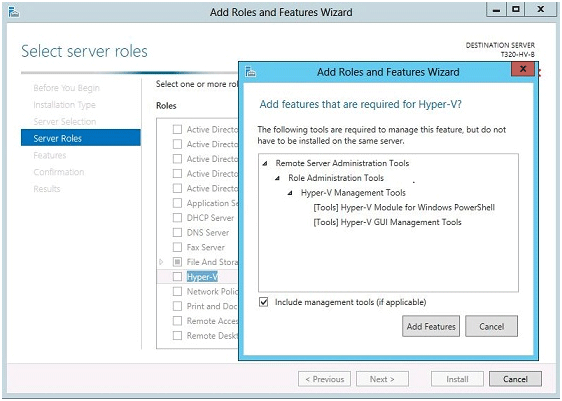
Step 5 ) Select Server Roles: On this page, choose "Hyper-V" role for the Server. A dialog box will appear on screen; click on "Add Features"
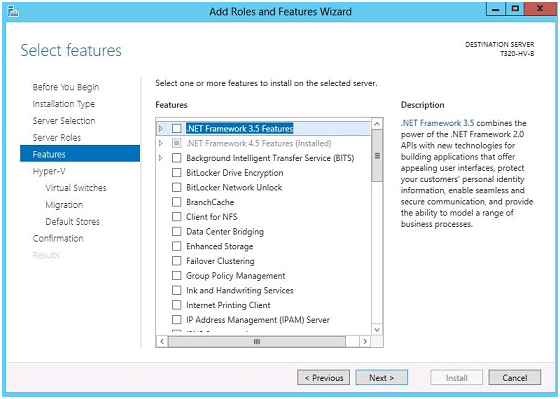
Step 6 ) Features Page: There are built-in tools available that can help to create and manage virtual environment. To add them, click on "Add Features". Click on next button to proceed further.
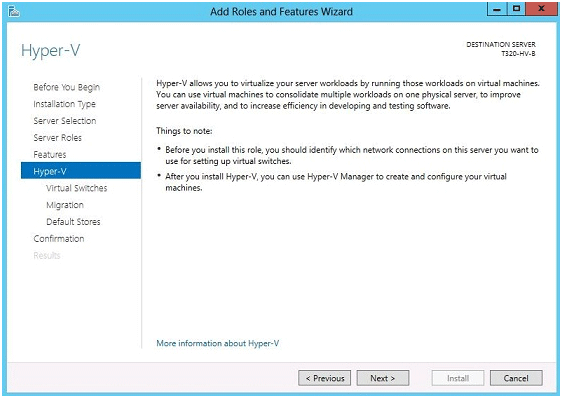
Step 7 ) Hyper-V Page: Here, an overview of Hyper-V will be available. You can read this and click next.
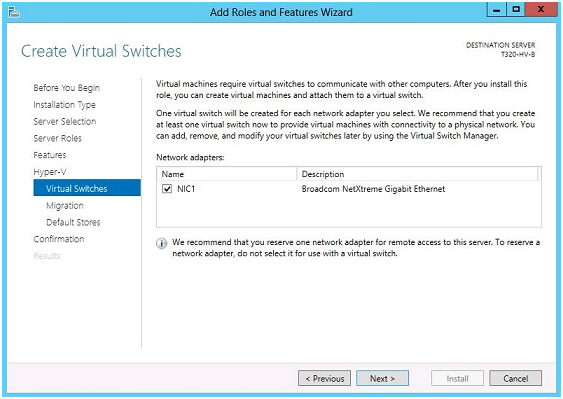
Step 8 ) Virtual Switches: Confirm details about network adaptors and click next to continue.
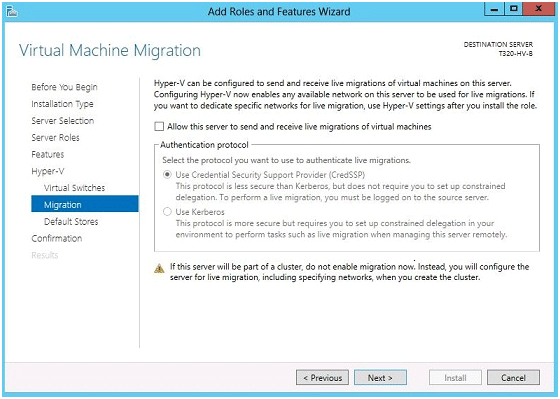
Step 9 ) Virtual Machine Migration: Provide suitable protocol for authentication.
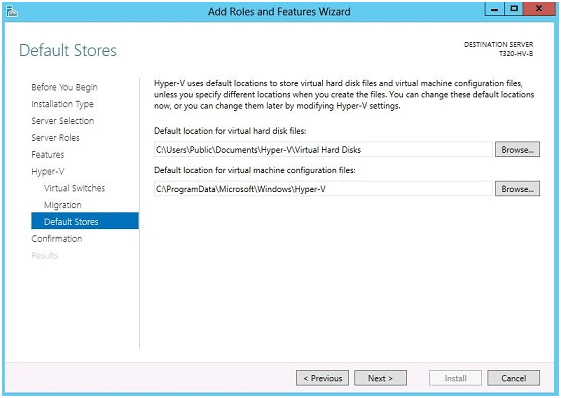
Step 10 ) Default Stores: On this page, default location for VHD files and configuration files will be displayed. Click on "Browse" button to make any changes to the default locations.
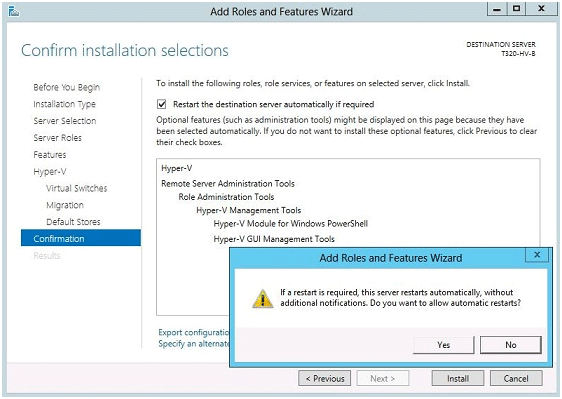
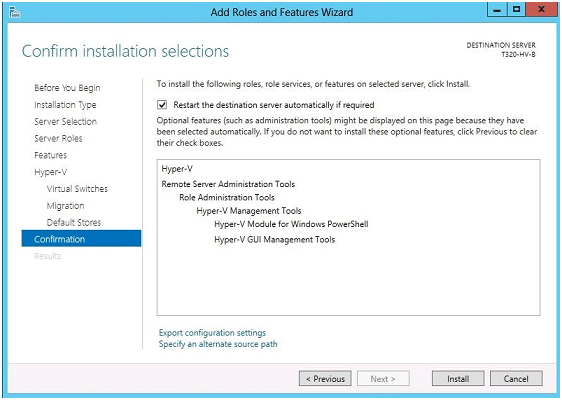
Step 11 ) Confirmation: On this page, you will be asked about automatic restart of destination Server. To allow application to do so, click "Yes"
To start Hyper-V installation, click on "Install" button on confirmation page.
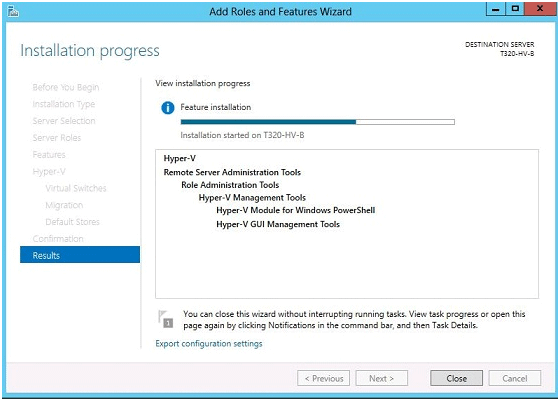
Installation Progress: Live monitoring of Hyper-V role installation on Server can be availed from this page.
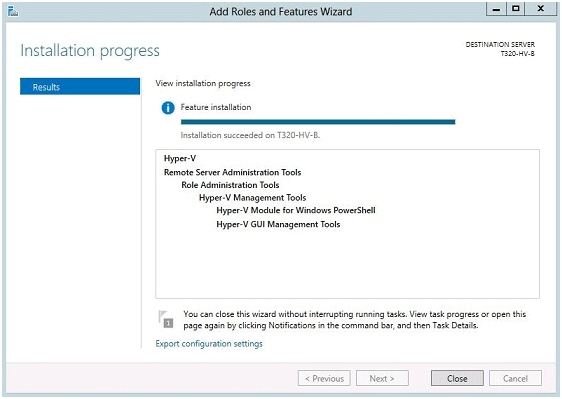
Once the destination Server restarts, open Server Manager and move to Installation Progress page. Make sure that the installation is successful.
Hyper-V is Microsoft' approved Exchange virtualization technique. It is a bit complicated to process but the features of application are quite helpful in setting up a virtual environment for Exchange Server. VMware and Citrix are two other powerful vendors in the market that help users to configure this set up reliably and a little conveniently too.

