Prerequisite:
Exchange 2007 & AboveLaunch Software to Start the Migration Process

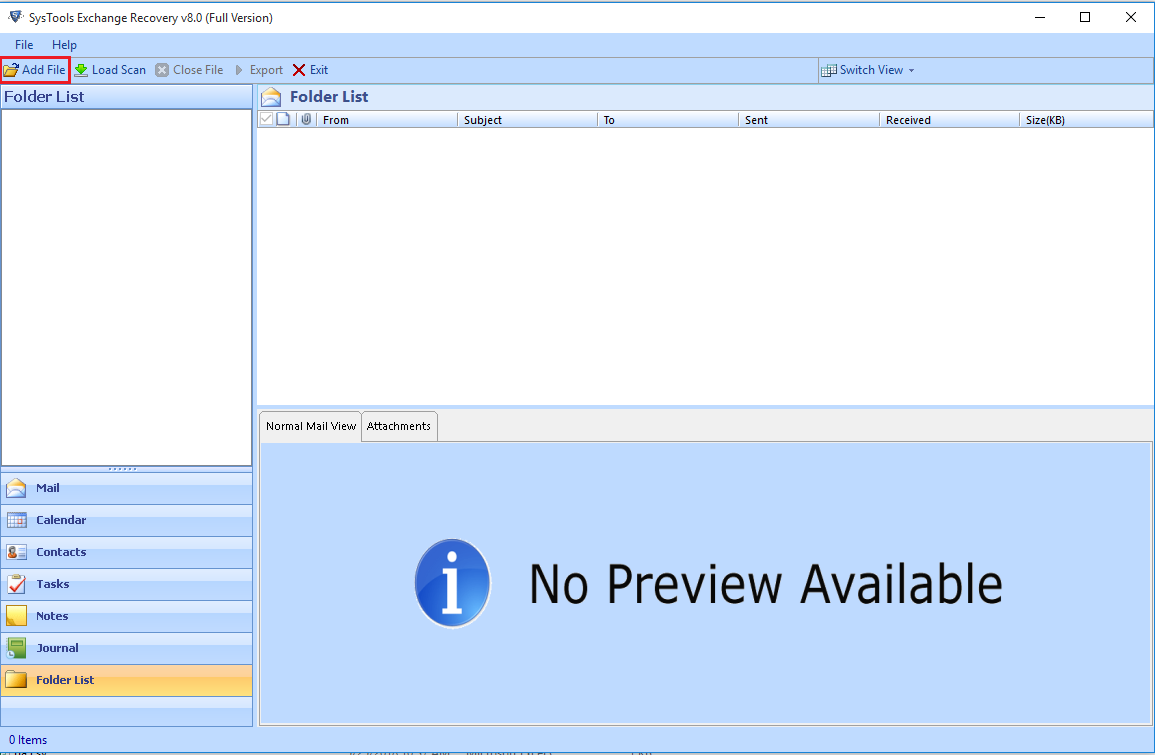
Add EDB files using Add file Option in Top Left Tab
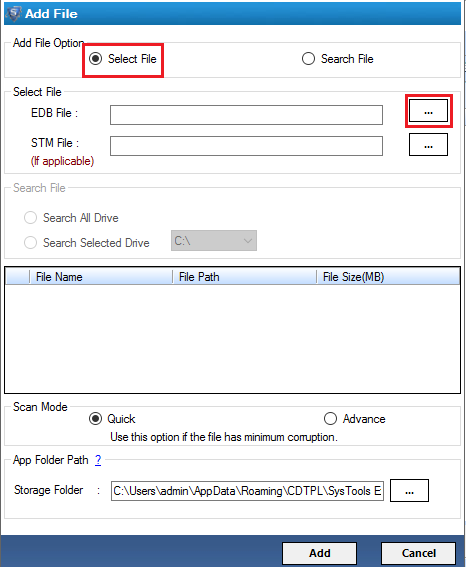
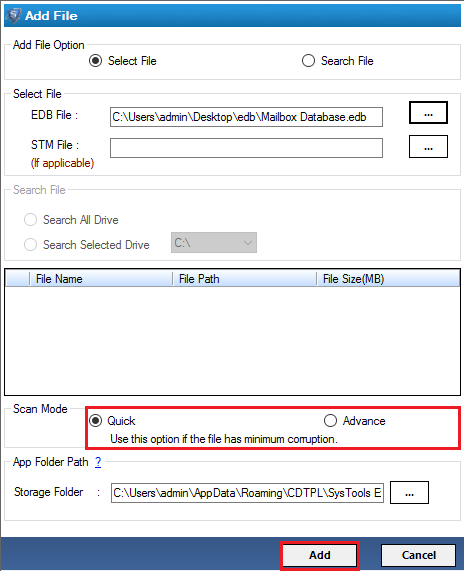
Select file or Search file option is available and Browse EDB Files or STM files
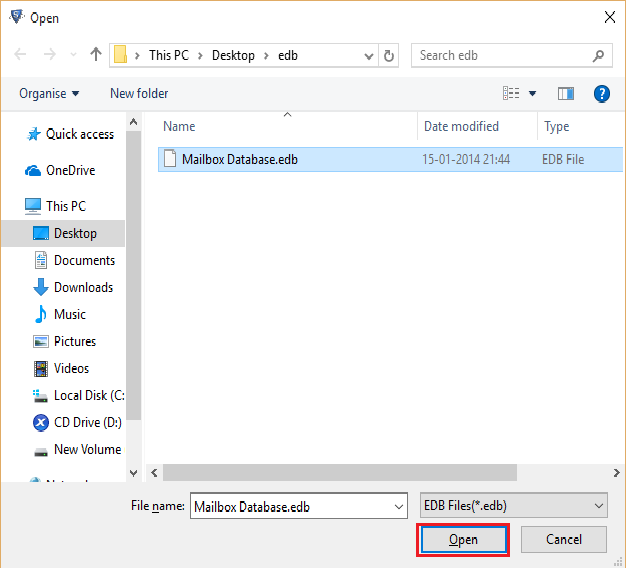
Browse EDB Location and open required file
Search All or Search Selected Drive for required file
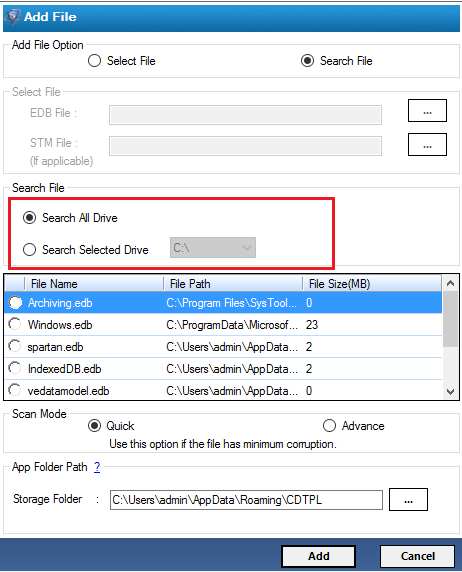
Select required EDB File from displayed files

Add files using Quick and Advanced Export
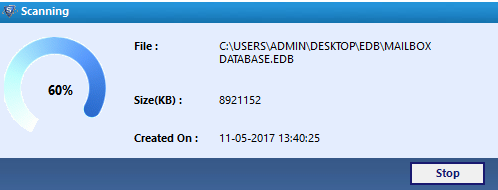
Scaning Process of files Started
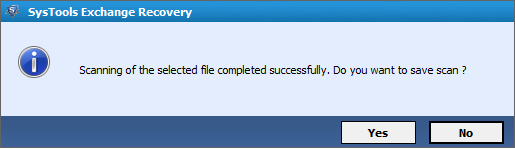
When Scan Process Complete. Save Completed Scan Report
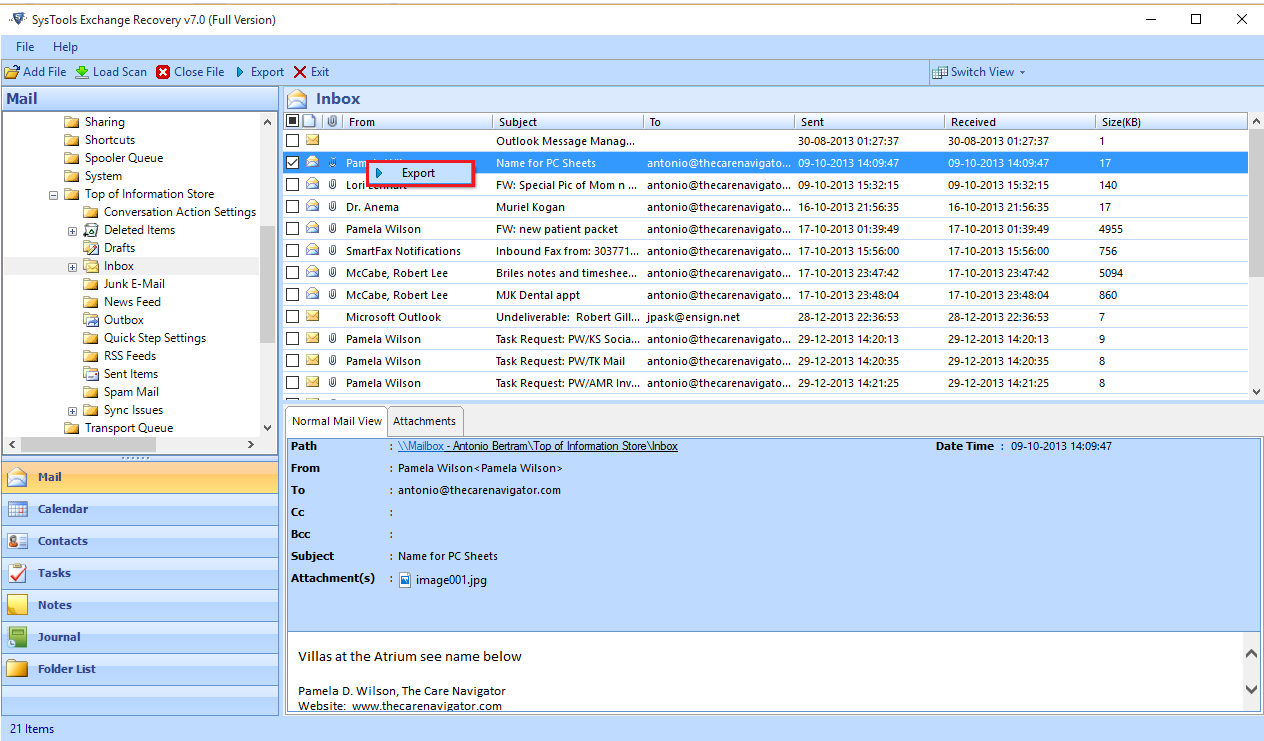
Normal Mail View for All Database files can be seen.
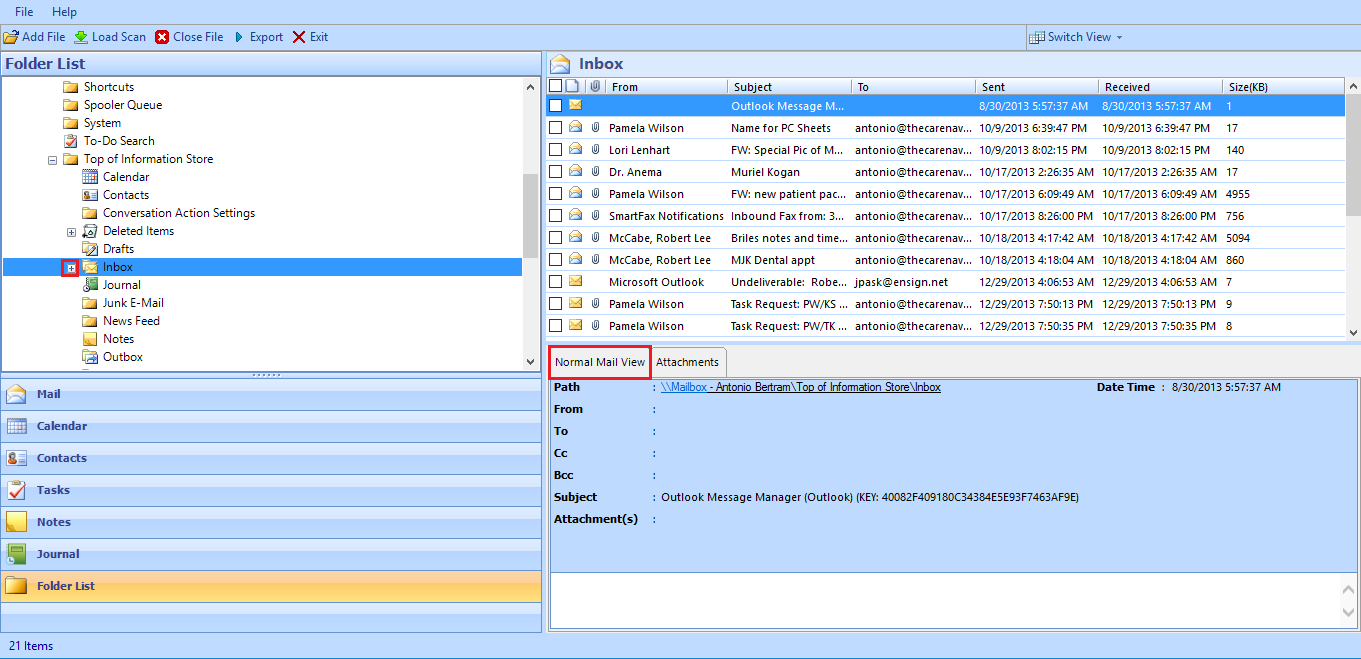
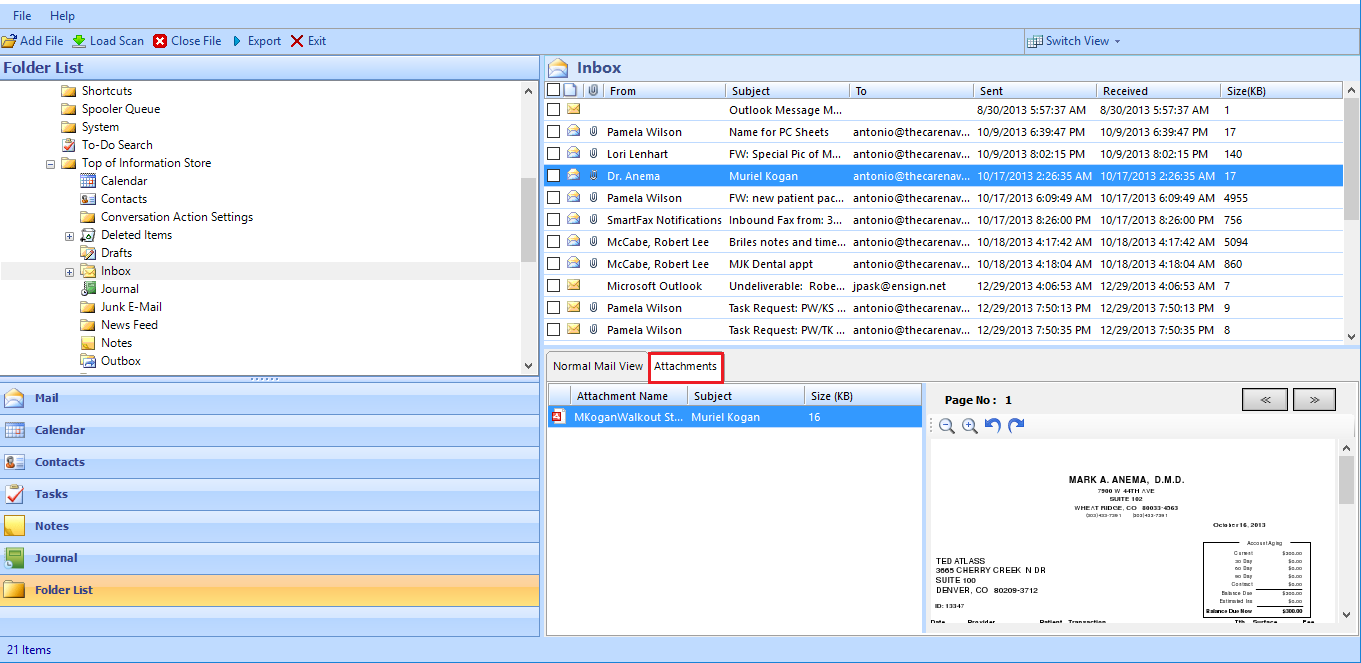
Software Also Provide Attachment View i.e. All Attached Files in mail can be seen in seperate View
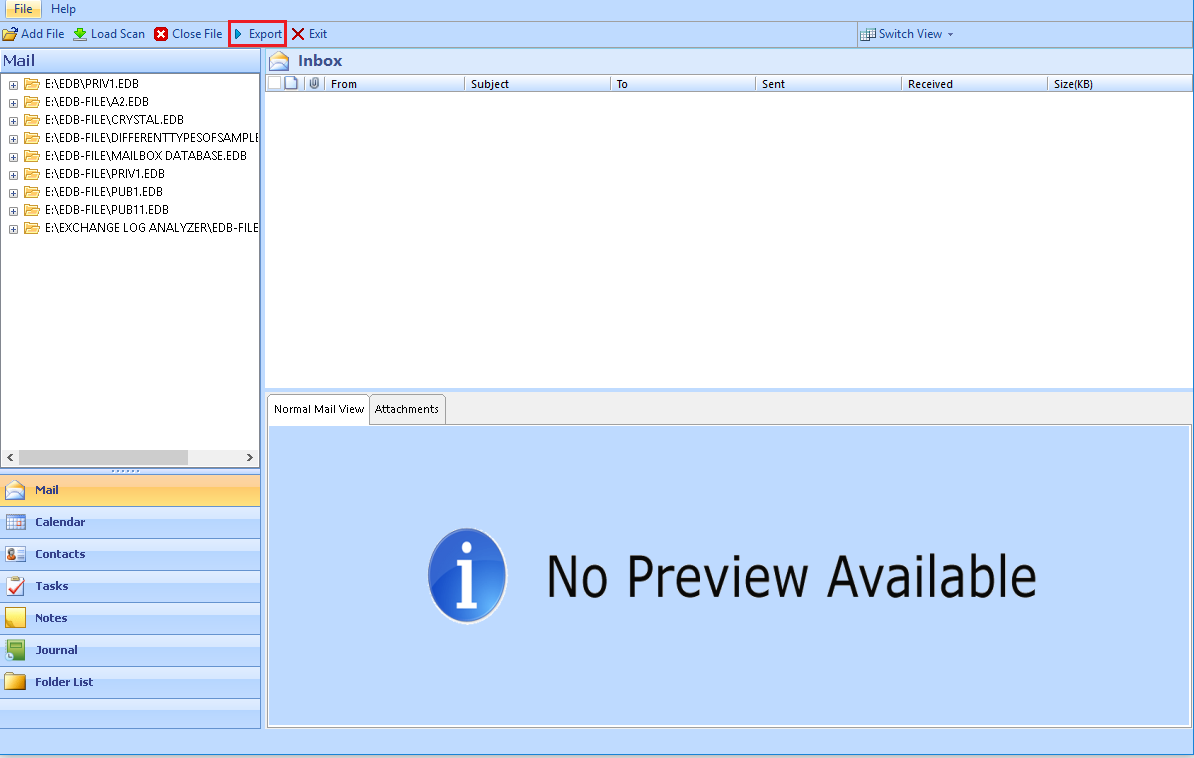
Export Entire Mailbox into Software. The Tool Suuport Large Size EDB files.
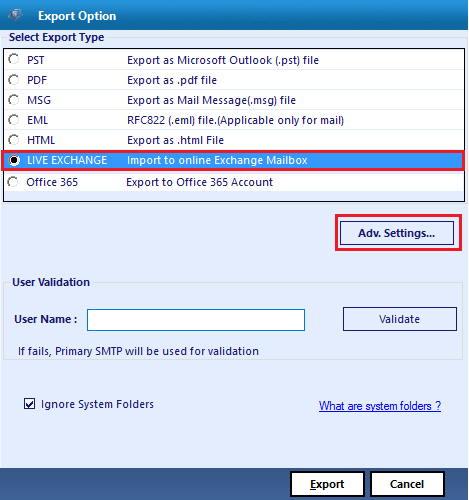
Go to Advanced Settings
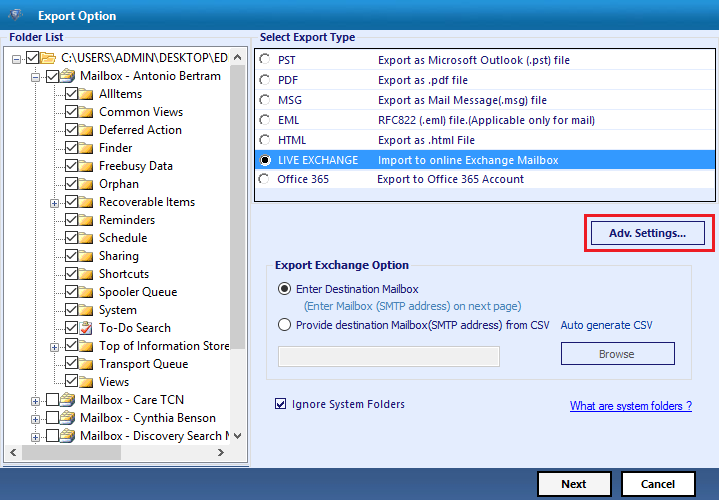
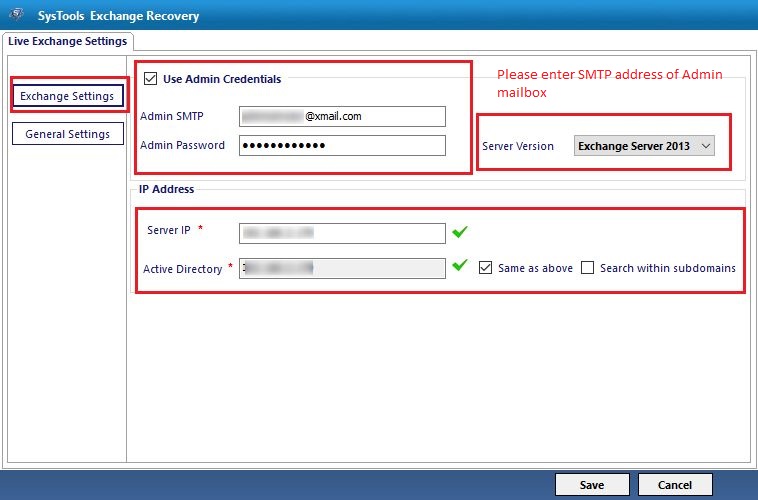
Configure Exchange Account Settings. Add SMTP, Password Server IP, Directory etc.

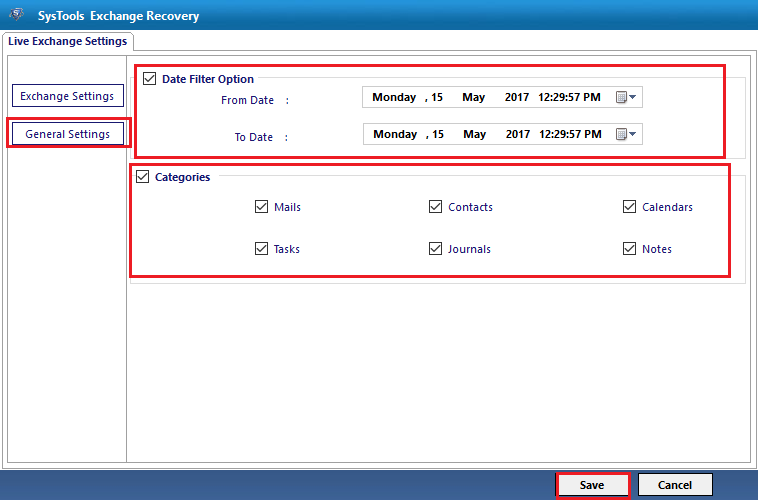
Filter Emails using Date Filter Option and Select Categories which you want to Export.
All Advanced Settings Saved Sucessfully

If user want to convert file into other format then Multiple Converting option is available.
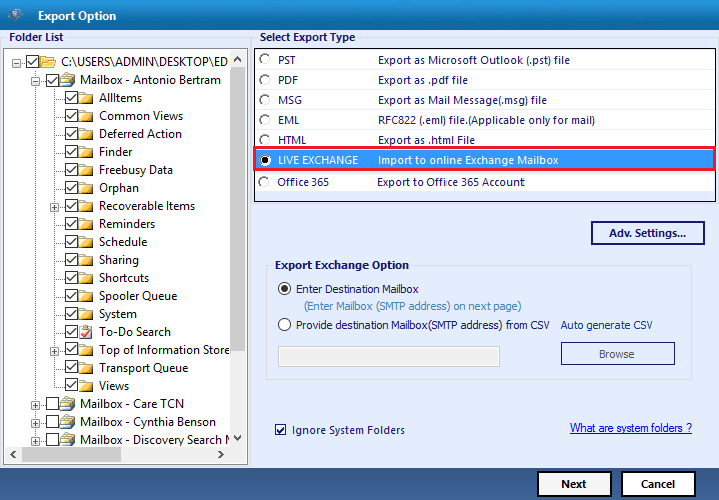
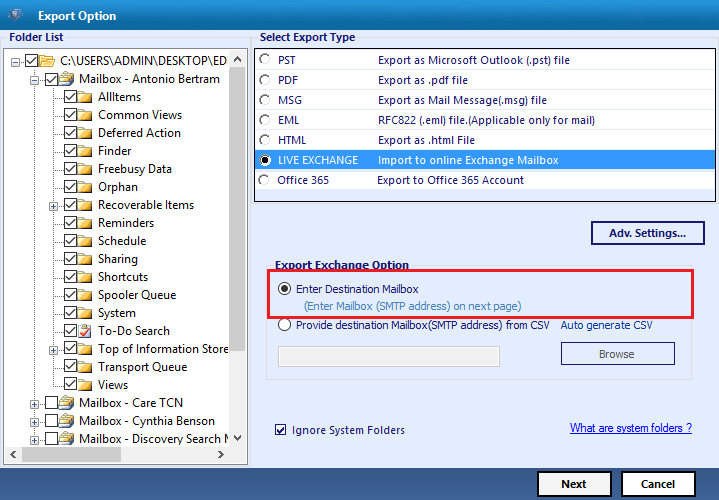
Select Enter Destination of Mailbox
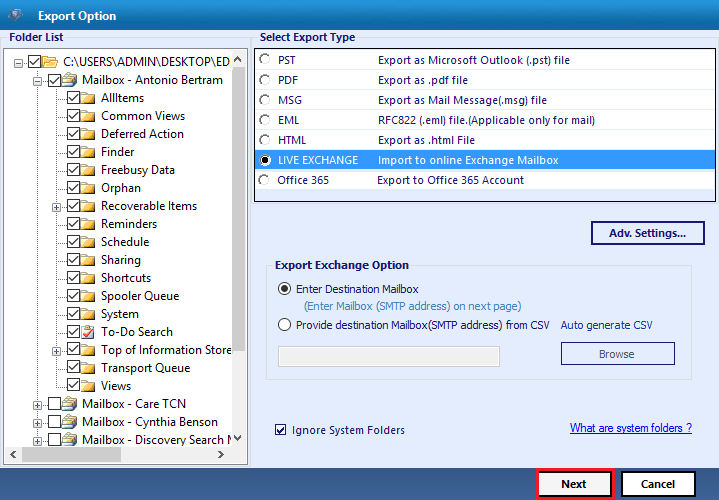
Click on Next option.
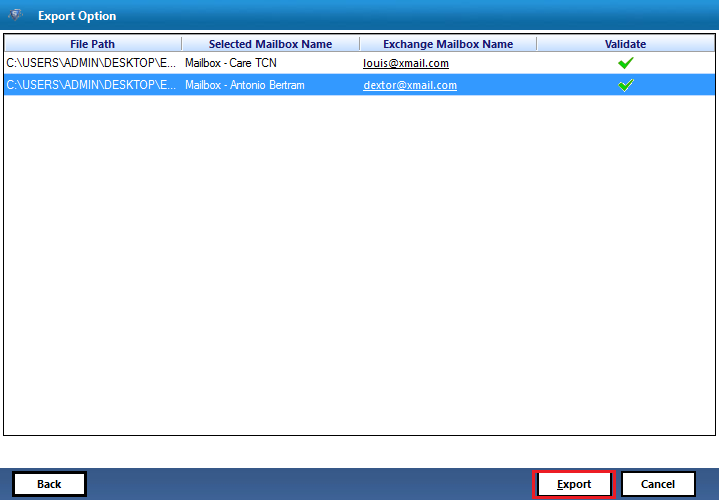
All Validate Exchange Mailbox are Dispalyed in this Tool.
When user Click on Export then Files Export Process start.
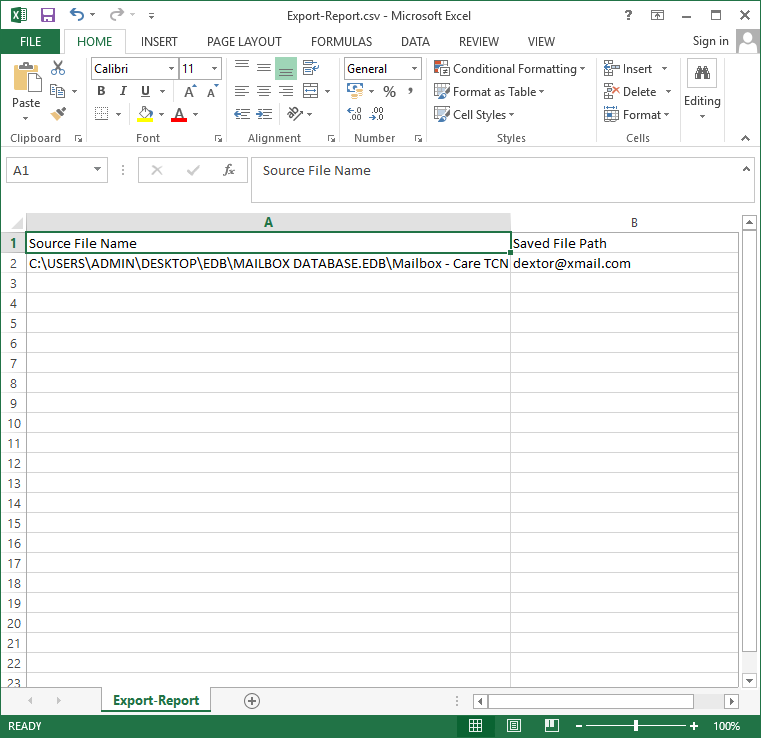
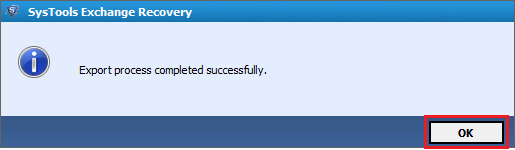
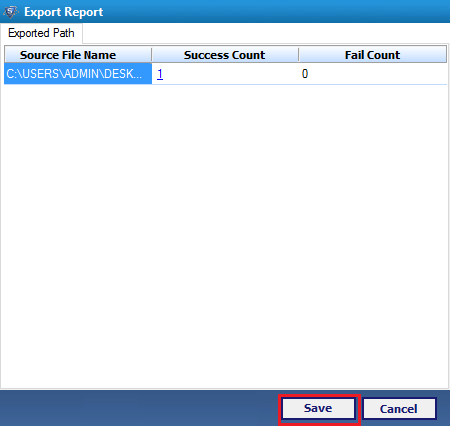
Export Report is Generated when Process is Complete
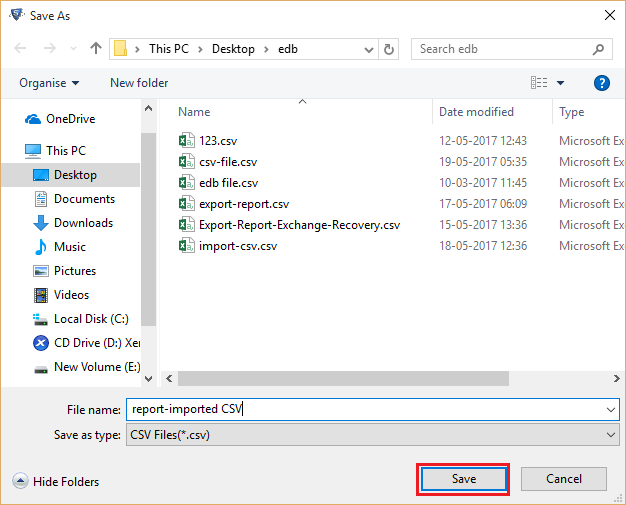
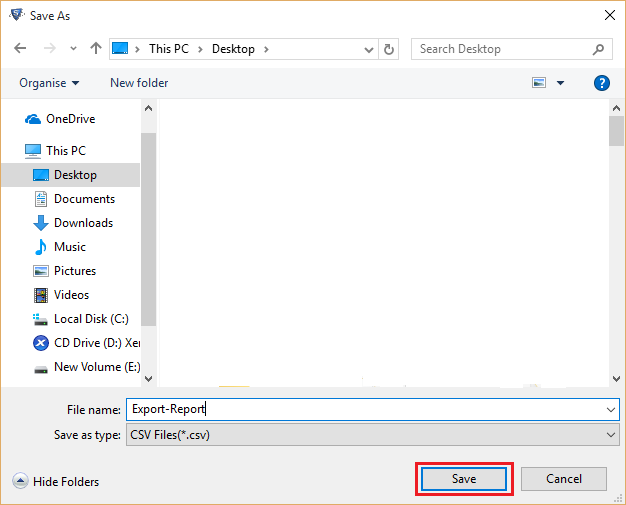
Save Export Report in desired Location
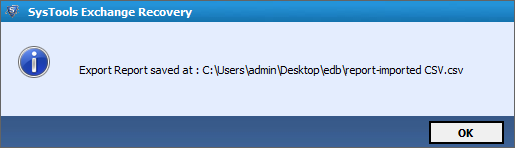
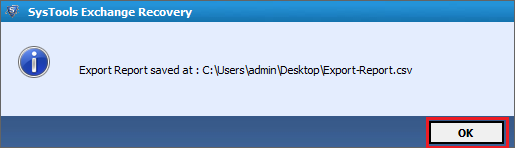
Export Process Saved Location is dispalyed where user stored all CSV files.

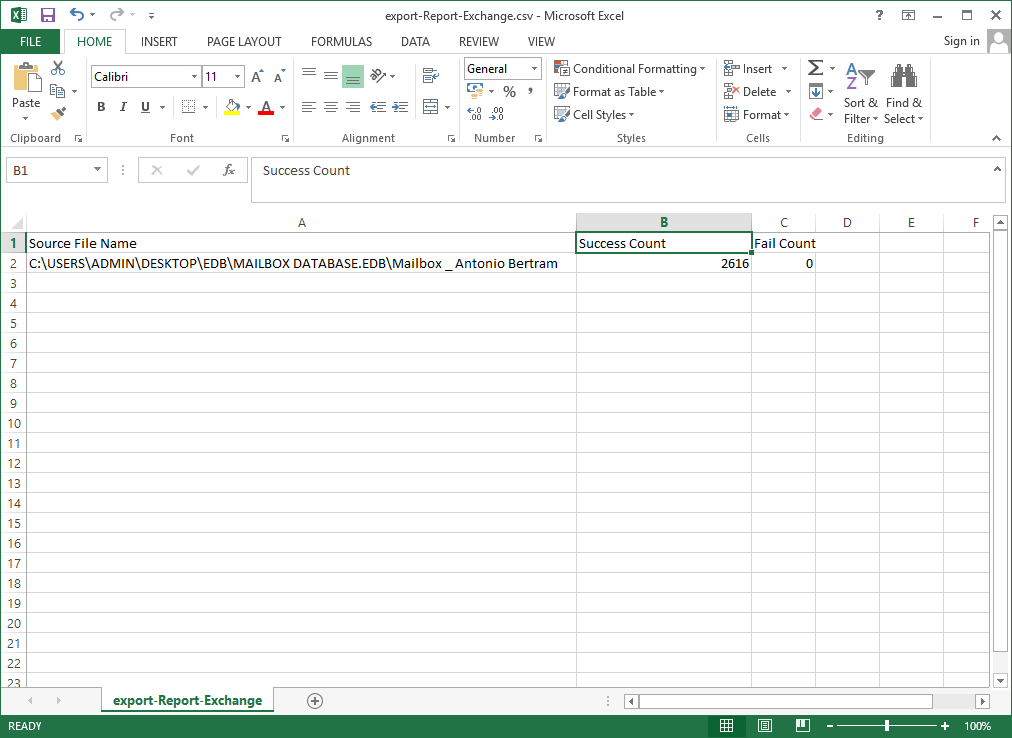
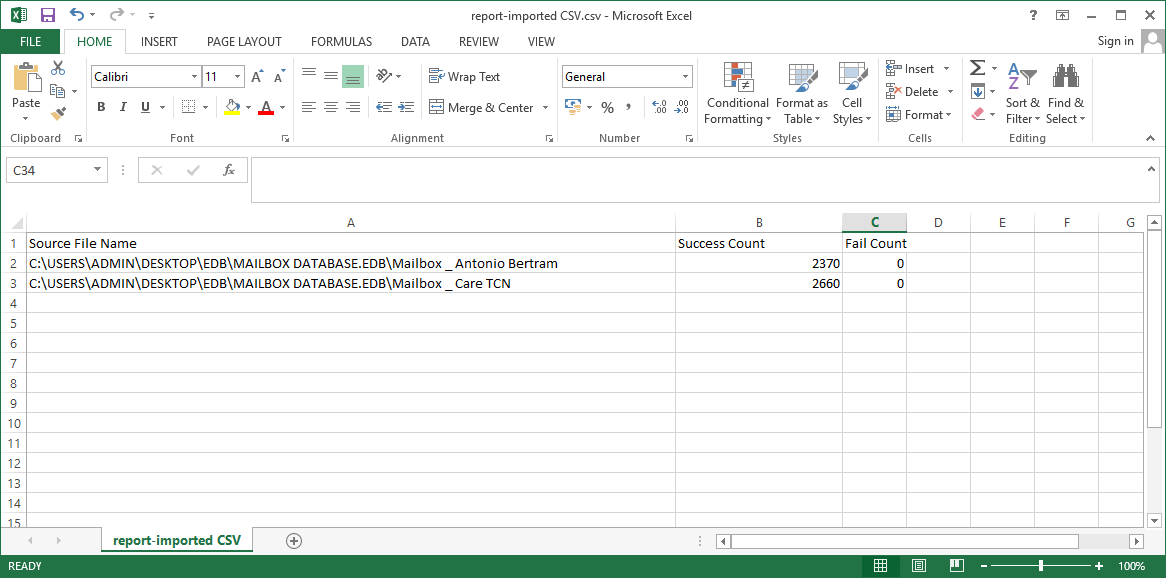
CSV Excel Sheet display details in all export report CSV
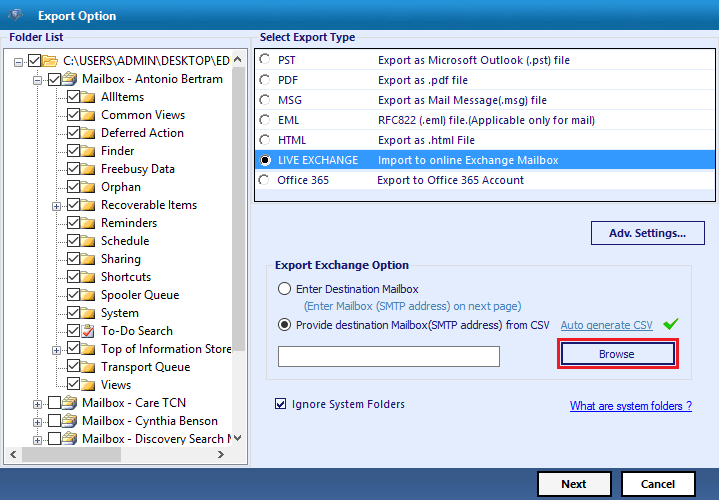
The Mailbox destination can also added using CSV file.
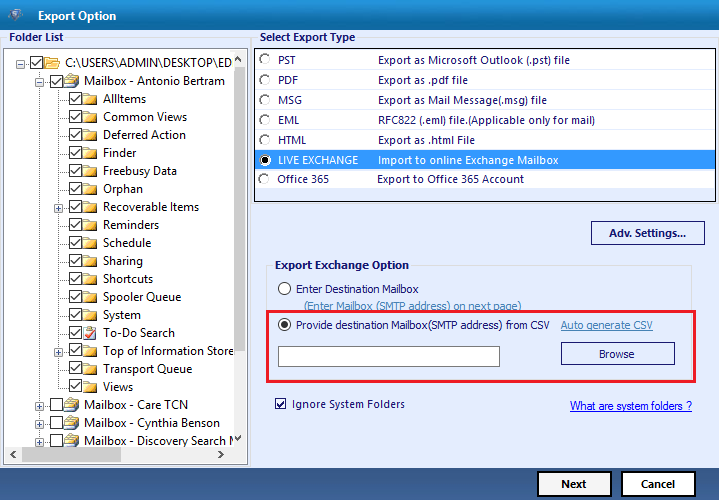
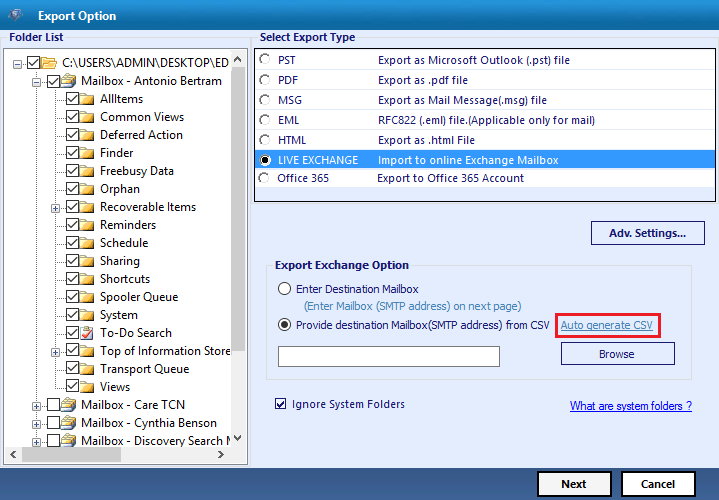
User can also user Autogenerate CSV option
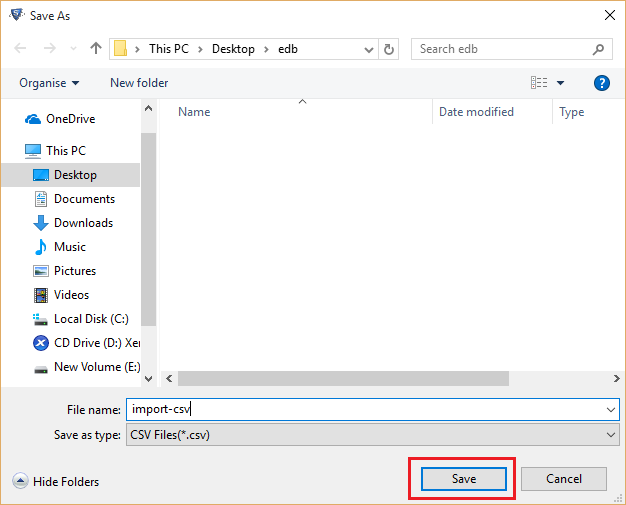
When CAV is Generated user can save it in desired Location.
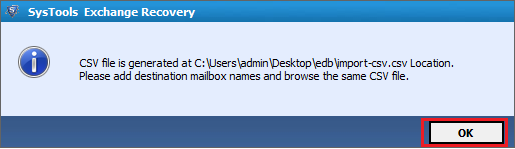
The CSV Import Location is displayed
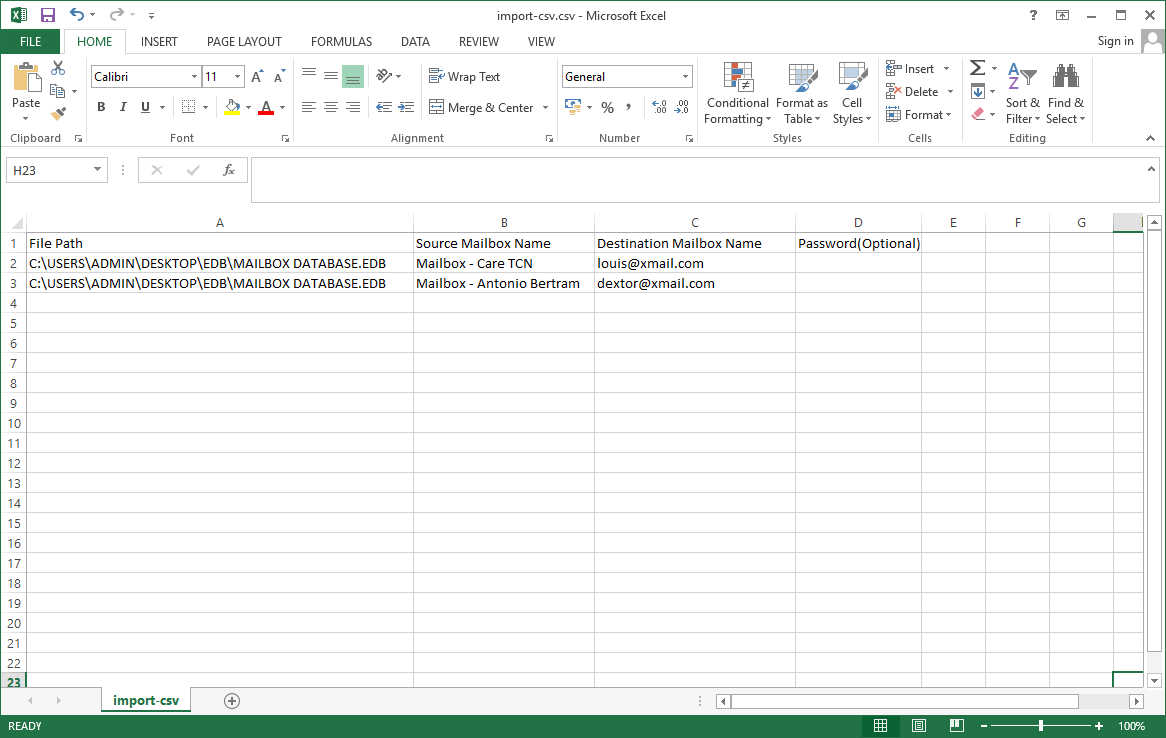
The Excel View Imported CSV File is shown below
Browse CSV Location where user import CSV file
Select and Open CSV File

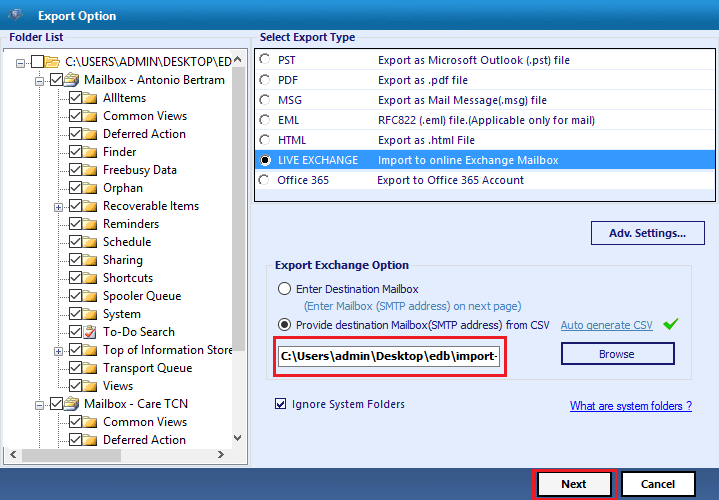
The Location of Mailbox is Automatically added in Browse section
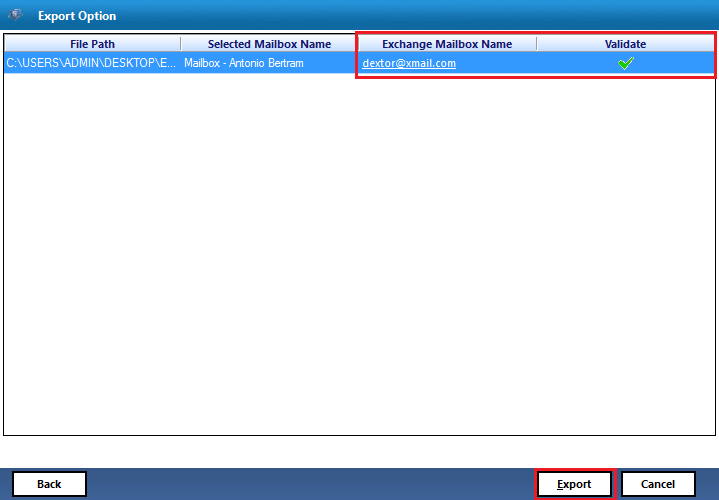
The Software Check Mailbox Validation
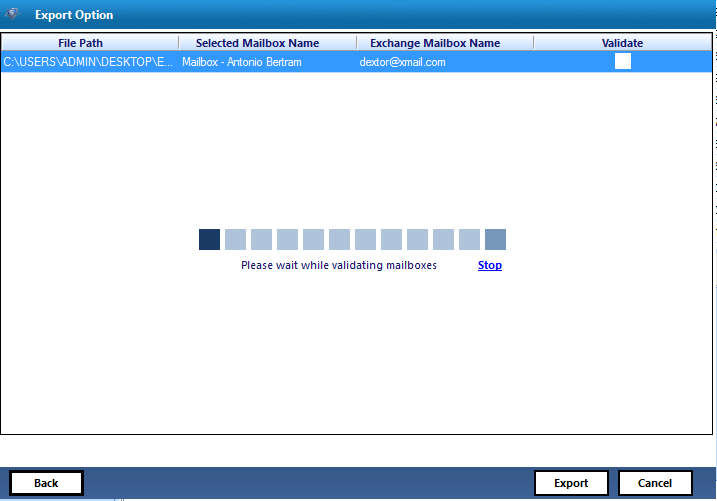
Once Mailbox forund as validated. All Mailboxes will display.Click on Export.
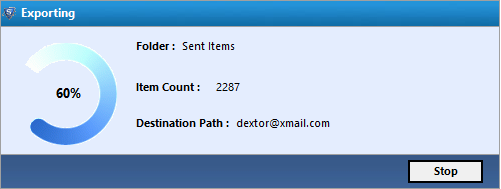
The Mailbox Export Process Starts

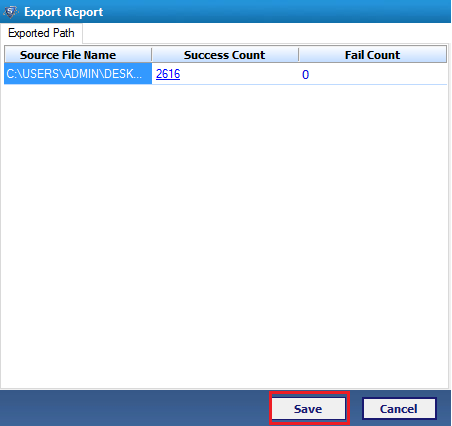
The Export Report for Mailbox is Generated

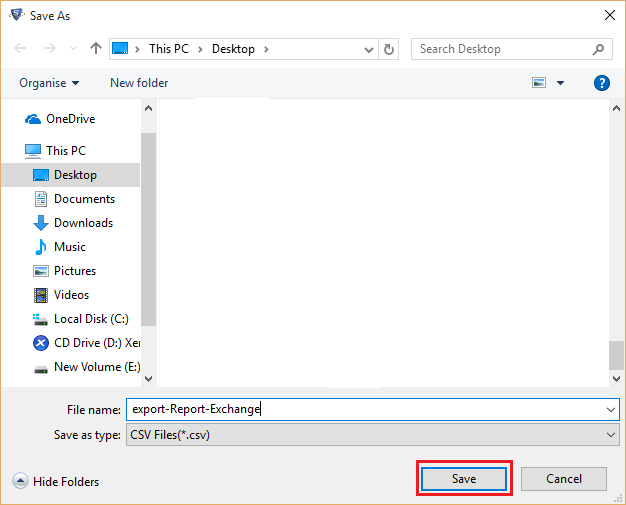
Save file in desired Location
The CSV Location is Displayed where the file is stored
The Export Process CSV file can be open as an Excel File.
The Other option is to Export Individual Mailbox or Email as shown below.
Slect Advanced Settings option from given options
Configure Mailbox by filling all required information about exchange serevr in Exchange Settings section
The Date Filters and Categories option provide export of selective emails and information.

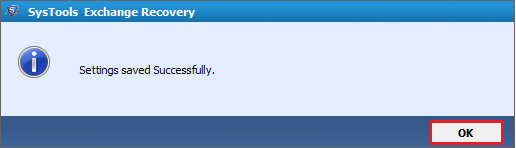
All Settings are saved sucessfully
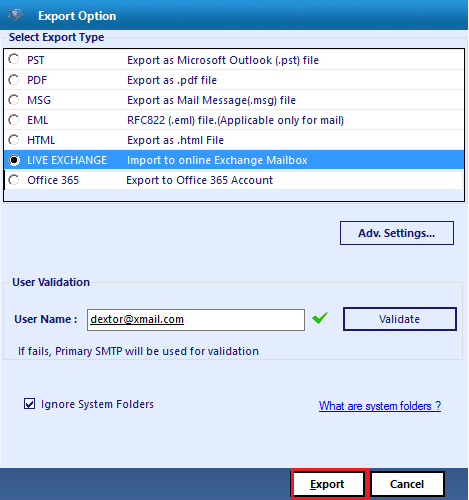
Enter Email and use Validate option to confirm it.
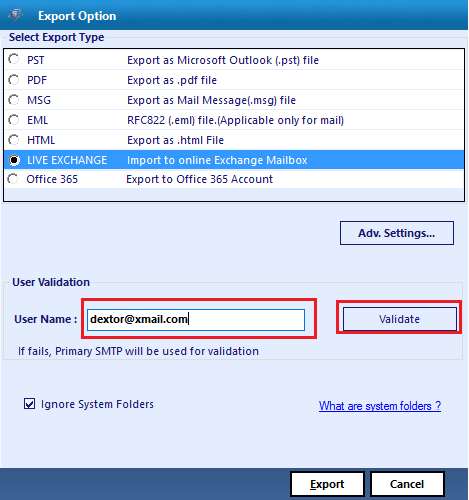
Once Email is validated, Click on Export to Export Email
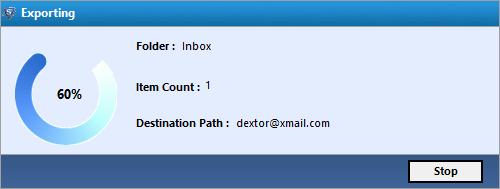
The Exporting process for selective Mailbox Starts
A confirmation is displayed when Export Process Completed
Save Export Report Generated after exporting selective mailbox
Save Export Report in desired Location
The Export Report Location is dispalyed where uer has stored it.
All Export Report can be seen as Excel Sheet.