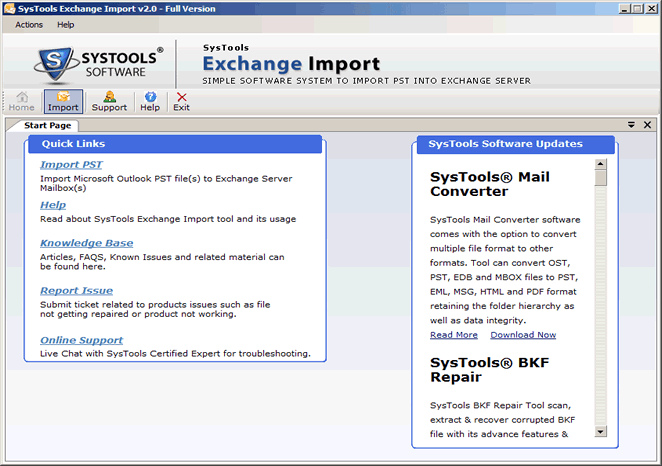
Once tool is installed the first screen that prompts up has a tab named 'Import' on the top left hand corner, so click on it to start. Thereafter, another screen pops up to add Outlook data files.
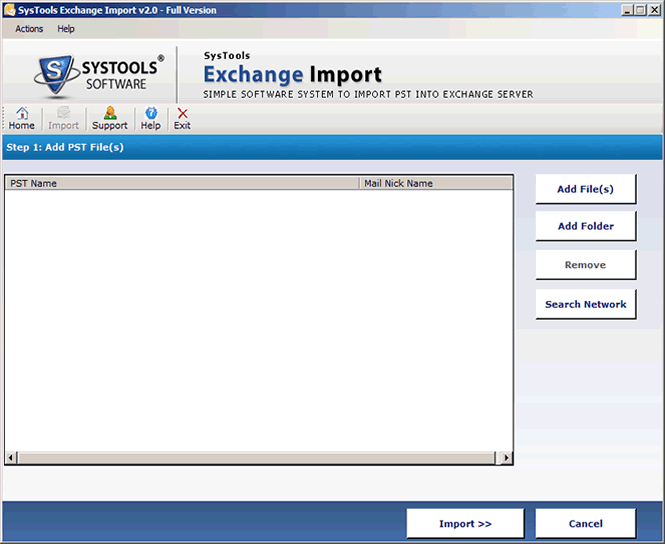
STEP 2:
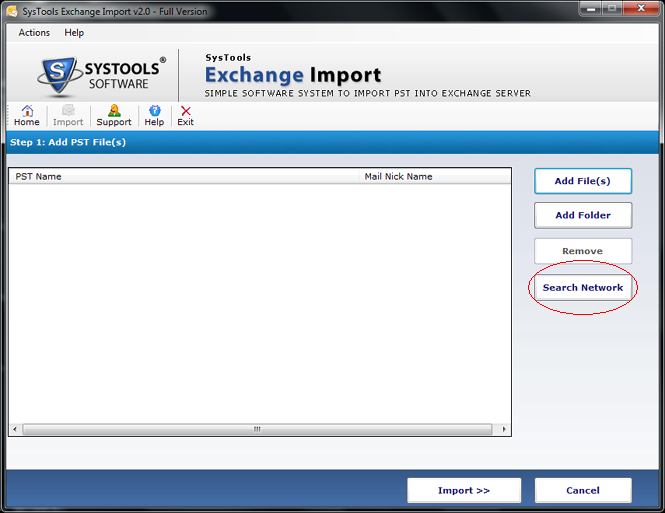
Select Add File
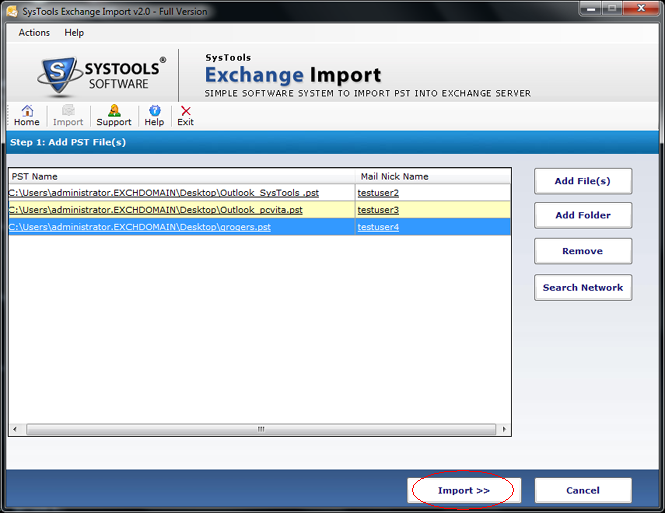
The second step is to choose any one of the options out of Add Files, Add Folders and Search Network that the screen provides, depending on requirement.
If 'Add Files' is selected:
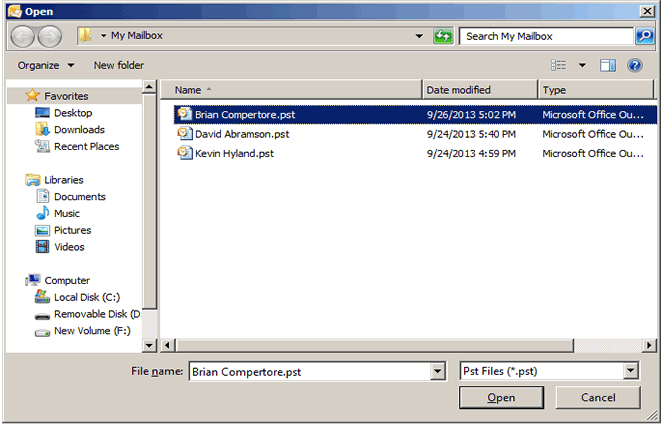
STEP 3. Click Open to View PST File
If Add Files is selected, then the interface gives the option to select the PST files to be imported. Once selection is done, click on 'Open' tab at the bottom right hand corner of the screen.
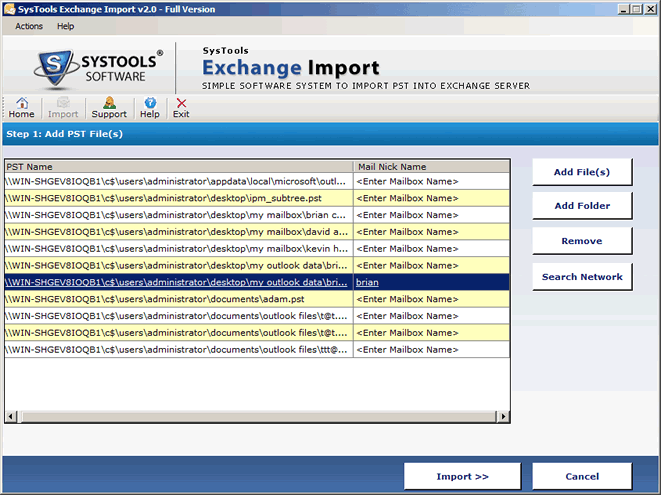
STEP 4: Display PST Files
After that, the chosen PST files get enlisted which shows up on the screen and besides the listed files, a tab is provided to enter mailbox nickname so as to import data to the specific mailbox.
STEP 5: Select Import button
Once over with entering name, select 'Import' button to import PST files to Exchange mailbox.
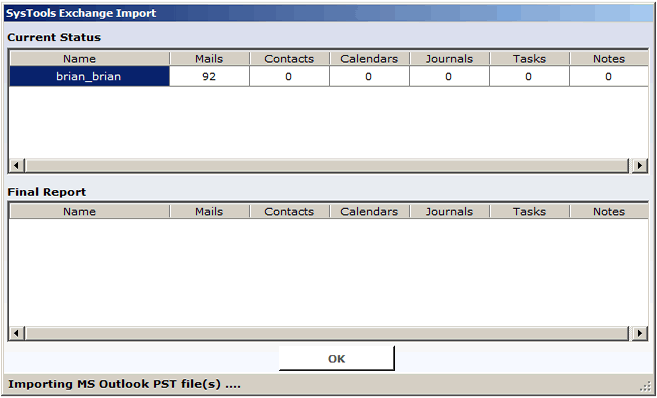
STEP 6: Check Status Report
Next screen that comes up shows the current status of the number of items imported till then and below it shows another tab named final report.
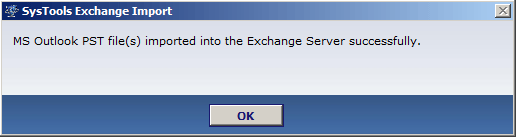
STEP 7: Click OK to Finish
On successful import of PST files the final report is generated with a message whose line of words is: "MS Outlook PST file(s) imported into Exchange server successfully".
If 'Search Network' choice is opted:
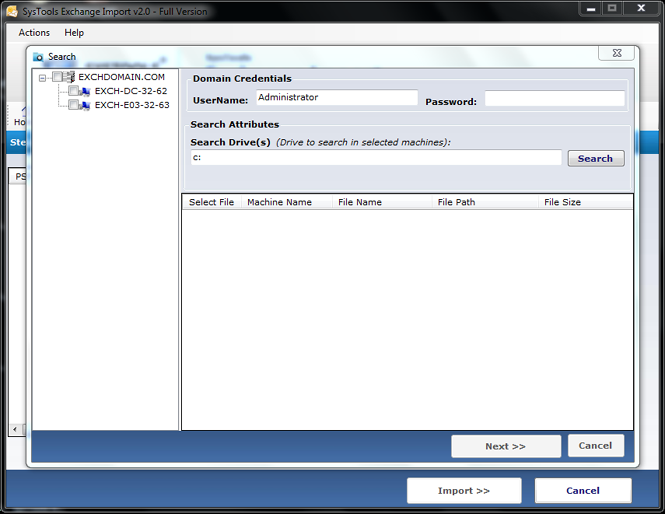
STEP 8: Select Network Tab
If users select "Search Network" option
STEP 9: Provide Credentials
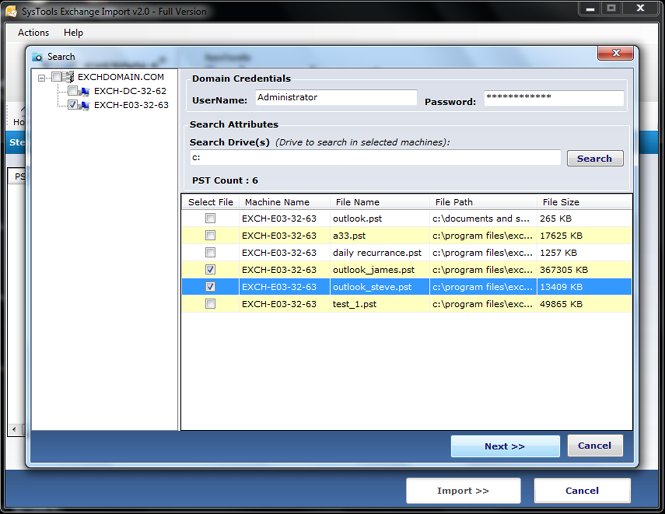
The wizard shows name of machines that are under the same Exchange domain. The screen has tabs such as Domain Credentials and Search Attributes that has search drive option.
STEP 10: Preview of all PST Files
Select the wanted system(s); enter user name and password, then search the drive after which the details of PST files will get listed.
STEP 11: Select PST File
Among the list choose the file to be imported. However it should be noted that for local machine there is no need to provide password but for other connected systems both info such as username and password needs to be entered. Then click 'Next.'
STEP 12: Click on Done
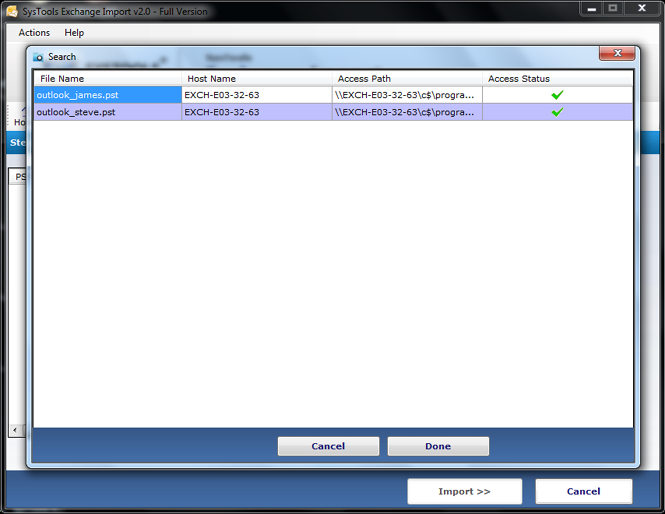
The interface now shows 'Access Status' and has a tab called 'Done' at the bottom right hand corner. Click on 'Done'.
STEP 13: Click on Import
Then proceed with the same steps (i.e. step 5-7 of the above section) followed that were used when the option 'Add file(s)' was selected.